SURPR!SE
サプライズ
2015.09.03
PBR for the Web. Part II: Marmoset Toolbag 2
While developing our own Physically Based Rendering (PBR) solution for the web, we got our hands on the Marmoset Toolbag 2 solution which is from our point of view the actual reference in terms of quality and expectation we can hope from a WebGL based viewer. In a way to benchmark and compare some result we decided to align one of our previous work with a Marmoset sample demo: the “Lens” by Joe Wilson. The purpose between the two modeling is somewhat different, while both are in a quest of hyper-realism, the sample file is targeting game industry asset and touch’n’feel while our perspective is product visualization. Game asset often rely on time erosion to add realism whereas in our case we have to deal with clean and neat surfaces.
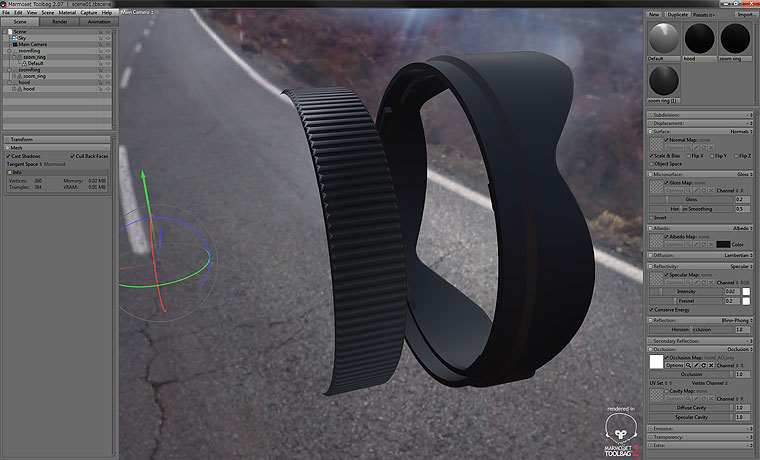
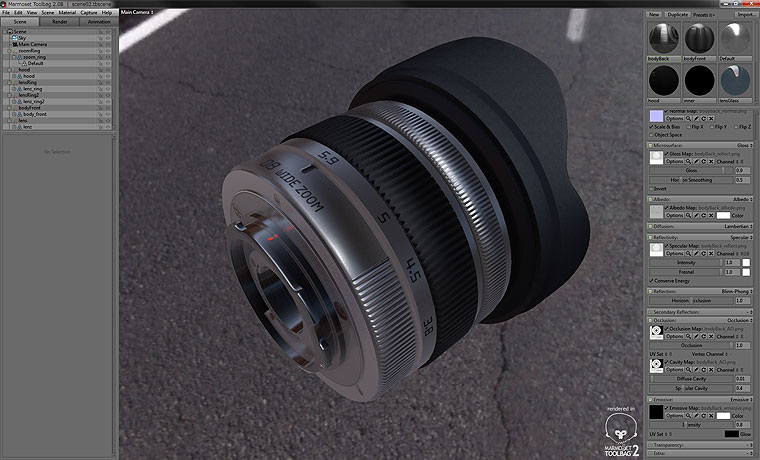
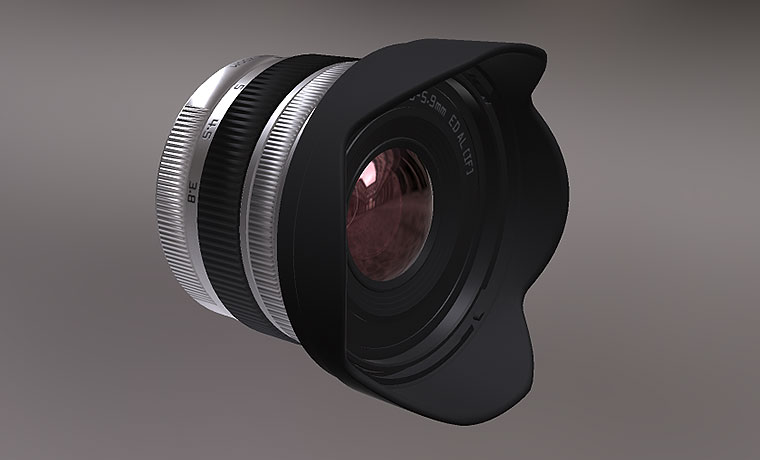 Our Marmoset Toolbag test model
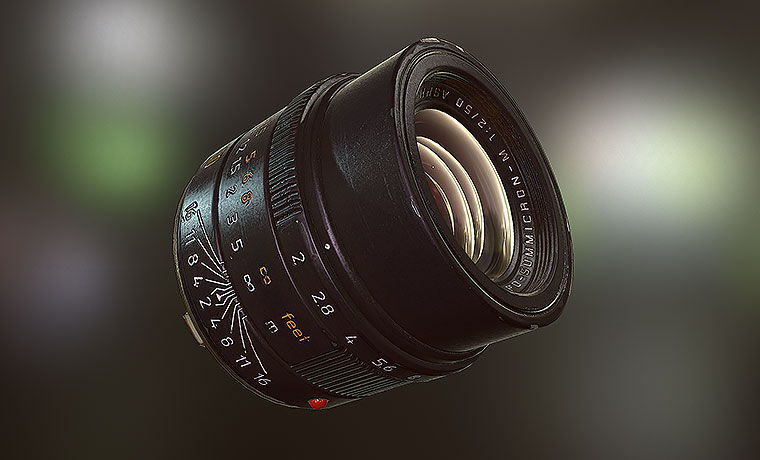
The Marmoset Toolbag 2 is a PBR renderer for 3DCG work showcase mainly designed for the CG artist of the game industry. Our interest in this product is the very accurate WebGL export function it provides and which is so far a reference in PBR-like rendering within a WebGL context. Note that the exported viewport can be also played as it is in modern smart-phone and tablet. Then an optional view is included in the viewer and let a break-down of the shader appears separately in a decomposed view. The Toolbag software also allows efficient glass material refraction.
The remaining part of this post deals with low-polygon texturing techniques we tried while implementing our test with this solution. We tried the Quixel Normal plug-in for photoshop and the Nvidia Normal Map generator. We also compared Ambient Occlusion map baked using Mental Ray. Here are the details about texturing and Lighting.
Please refers to our preview post to read more about the modeling:
https://sky-link.co.jp/surprise/cggraphics/cad-to-low-polygon-topology-tesselation/
https://sky-link.co.jp/surprise/cggraphics/cad-to-low-polygon-topology-tesselation/
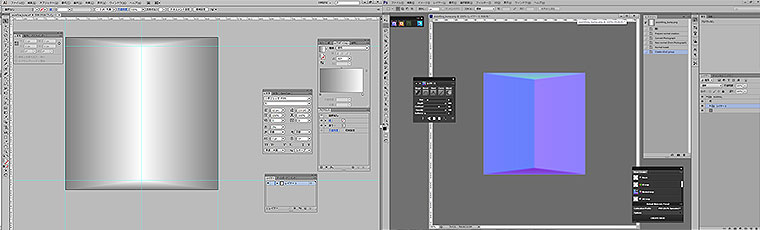 ズームリングの凹凸はジオメトリでの表現にコストがかかるので、ノーマルマップで表現します。イラストレーターでheight mapを書いていきます。
作ったheight mapをphotoshopでnormal mapに変換します。ここではQuixel Suiteの試用版を使ってみました。変換ボタンを押すとガチャガチャとアクションが走って変換されました。
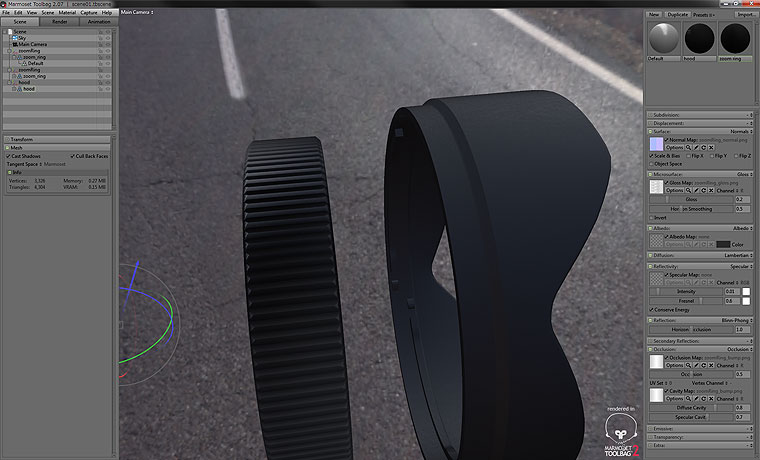
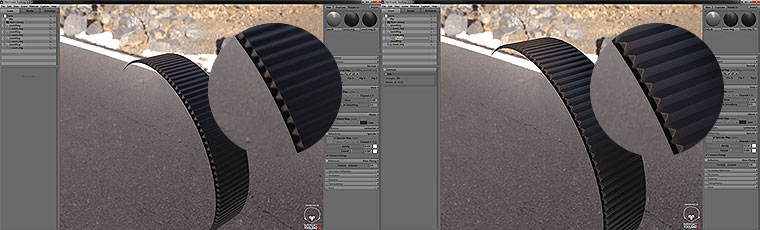 Normal mapを実際のモデルに当てて見ます。512*512の解像度ですと、荒いようです。
解像度は512のままで、テクスチャのタイリングを変えてみました。これで凹凸がきれいに見えるようになりました。
 アンビエントオクルージョンを追加。
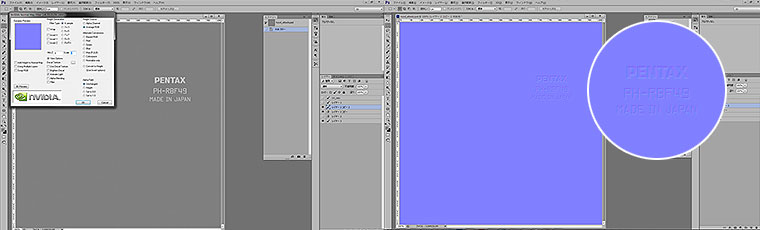 レンズフードのheihgt mapをnVIDIA texture toolsを使ってnormal mapに変換してみます。こちらは単にフィルタなので、アクションで待たされる、undoしづらいということはありません。
右がnVIDIA texture toolで変換したもの。
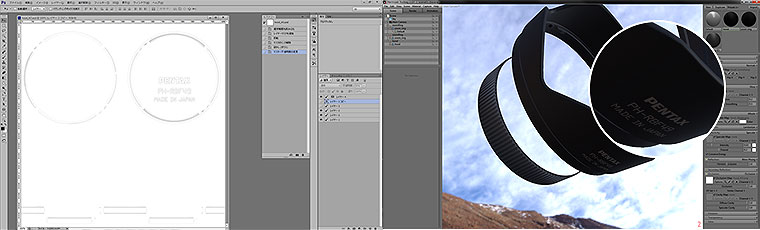 レンズフードのAOも作っていきます。今回はmental rayでAOの計算をしました。文字の周りなどはphotoshopで足します。
AOとnormal mapをフードに追加しました。(右側)
 表面にザラザラ感を出したいので、gloss、specularにノイズを足してみます。
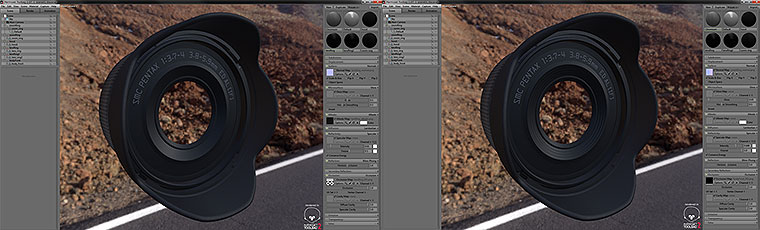 前面も動揺に作っていきます。右がnormalとAO mapが入った感じです。ここの細かい段差もnormalで表現します。
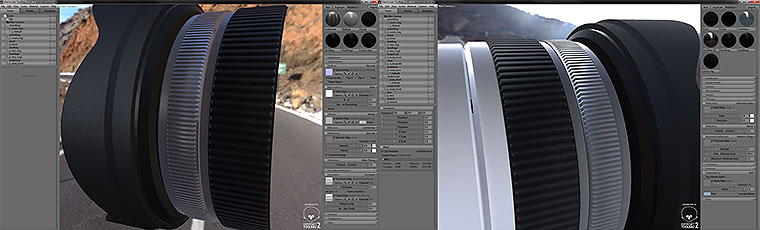 左側Normal mapのエッジ部分が変な映り込みをしています。
これはメッシュのtangent spaceに3dsmaxを選ぶことで直りました。(右側)
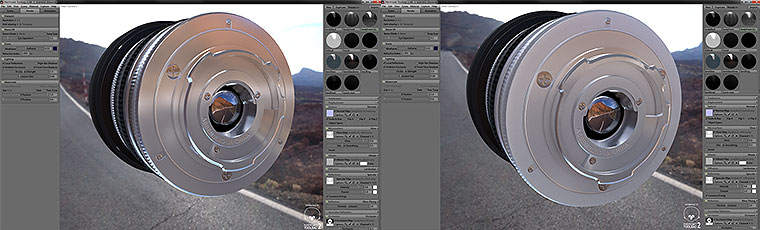
ボディとの接続部分、右側はgloss、specular mapを入れた状態です。
Glossが高いとピカピカ、低いとザラザラに。Specluarは反射の強さを制御する感じでしょうか。
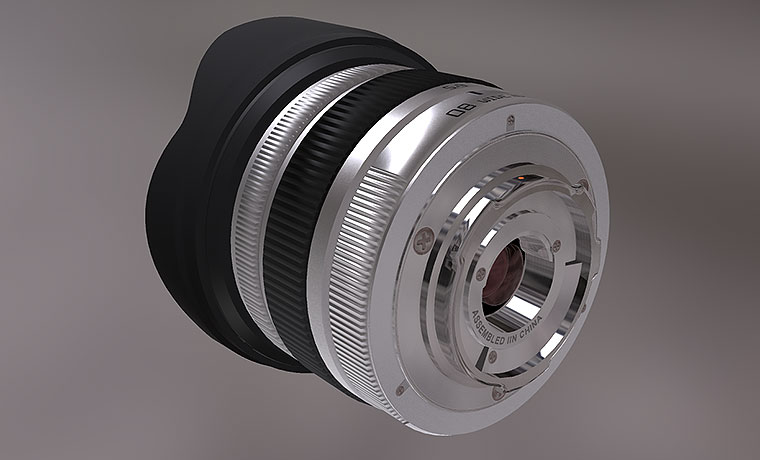
 後ろのメタル部分は1つのモデルで作ったので凹凸部分のnormal mapの解像度が足りていません。(左側)
UVを凹凸部分の面積が大きく取れるよう調整、mapも調整しました。(右側)
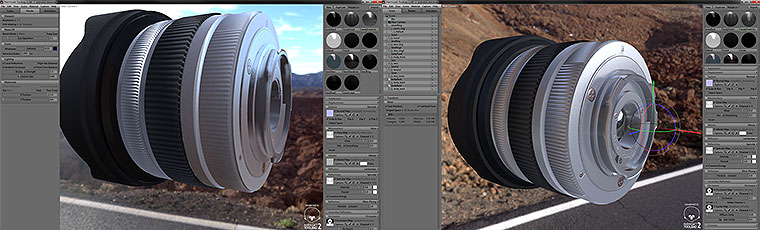
 文字や数字、合わせ用の点などディティールを追加しました。Local reflectionをonにしているので、オレンジの丸が自己反射しています。残念ながらwebGLには反映されないようです・・
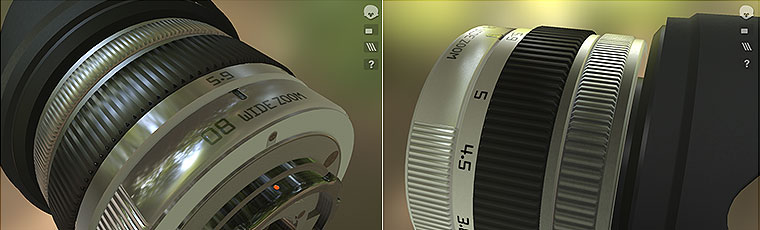 Viewerに書き出してブラウザから確認してみましたが、Gloss mapがキレイに書き出せていないようです。(左側)
Marmosetの仕様を見てみると、gloss mapはinvertにチェックが入っていると書き出せるよとの事・・・
チェックを入れてmapを調整してみました。(右側)
 反射のhorizon occlusionで、どこまで周囲を反射するかを調整して完成としました。
Here is a link to our real-time demo.
参照サイト
- PBR for the Web. Part I: Overview
https://sky-link.co.jp/surprise/cggraphics/pbr-for-the-web-part-i-overview/ - Marmoset Toolbag 2
http://www.marmoset.co/toolbag - Joe Wilson 3D Art
http://www.joewilson3dart.com/ - Quixel NDO
http://quixel.se/ndo - Nvidia Texture Tool
https://developer.nvidia.com/nvidia-texture-tools-adobe-photoshop